Ritual Part 2 - Designing V1
Bringing the board and cards to life!

Hello, everyone,
In the previous part of this series, we delved into the process of ideating our product, "Ritual". We shared how we brainstormed, deliberated, and eventually shaped the product's central idea. Now, I’m thrilled to guide you through the next phase of our journey, where we took our concept, existing only in thoughts and discussions, and transformed it into something tangible. We will explore the journey from sketches and 3D modelling to prototyping and realization.
Lessons Learned
Do your homework. Try to learn exactly what you need before diving in. It's friendlier on your time investment to research and get it right the first time than to redo it.
Meeting the right person can be the difference between moving forward with your product and the journey coming to an end. If you don’t meet someone who gives you enough time to understand the idea before shooting it down, don’t take their word for it.
The economics of clustering is a real phenomenon. Getting this far into the journey would have been significantly more challenging if I didn't live in the city. Having so many choices for businesses that could help or people to talk to is invaluable.
I. The Drawing Board: Sketches
All product development starts somewhere. For us, it began with a series of sketches. With a product concept in mind, we tried a number of different designs, experimenting with various shapes and sizes. Here's a glimpse at some of the preliminary work.
2. Diving into 3D: Blender
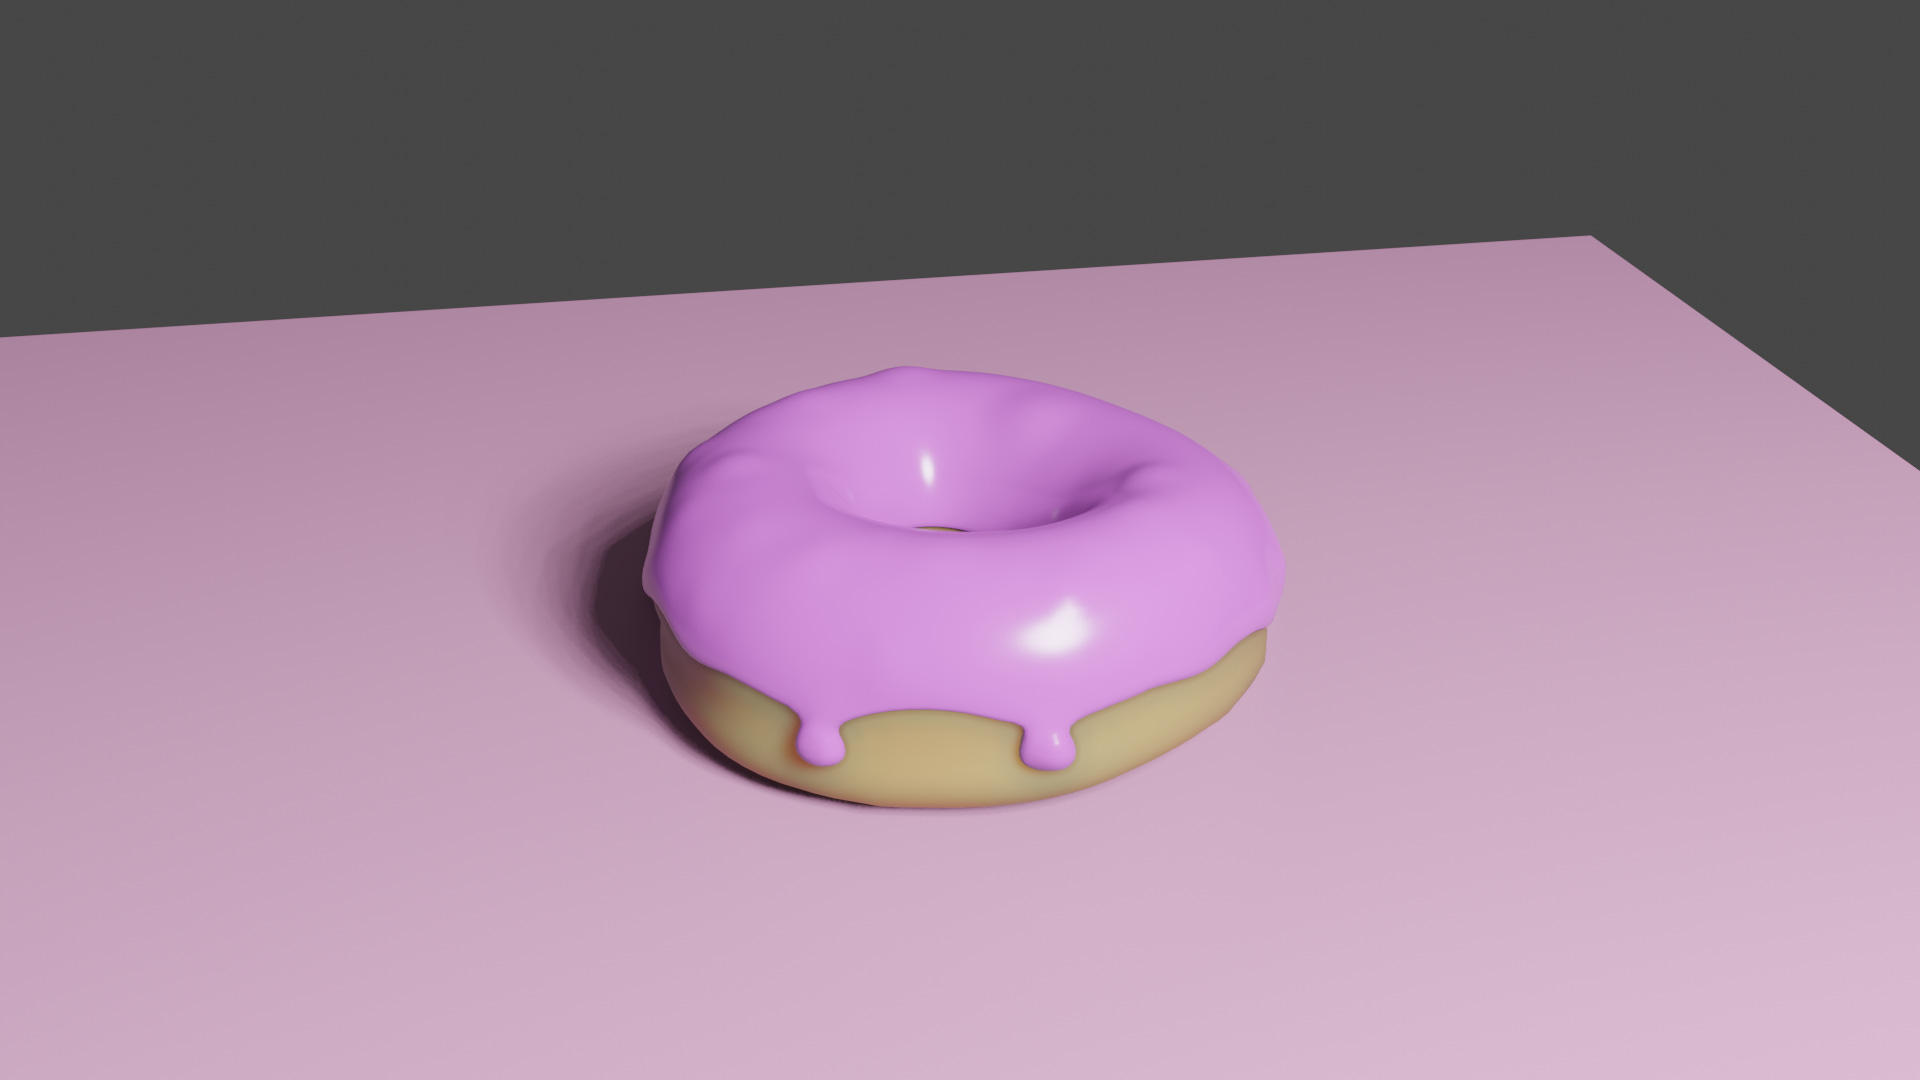
After finalizing the sketches, we moved onto 3D modelling with Blender. I had never used Blender before, but given that it was free and renowned for 3D modelling, I decided to try it. To quickly understand the software, I turned to YouTube tutorials, specifically Blender Guru's. His donut tutorial playlist, with an impressive 6.4 million views, provided the perfect introduction I needed to begin my 3D modeling journey for "Ritual". I even managed to bake my own digital donut, as seen below.
Blender Guru's Blender Beginner Donut Tutorial
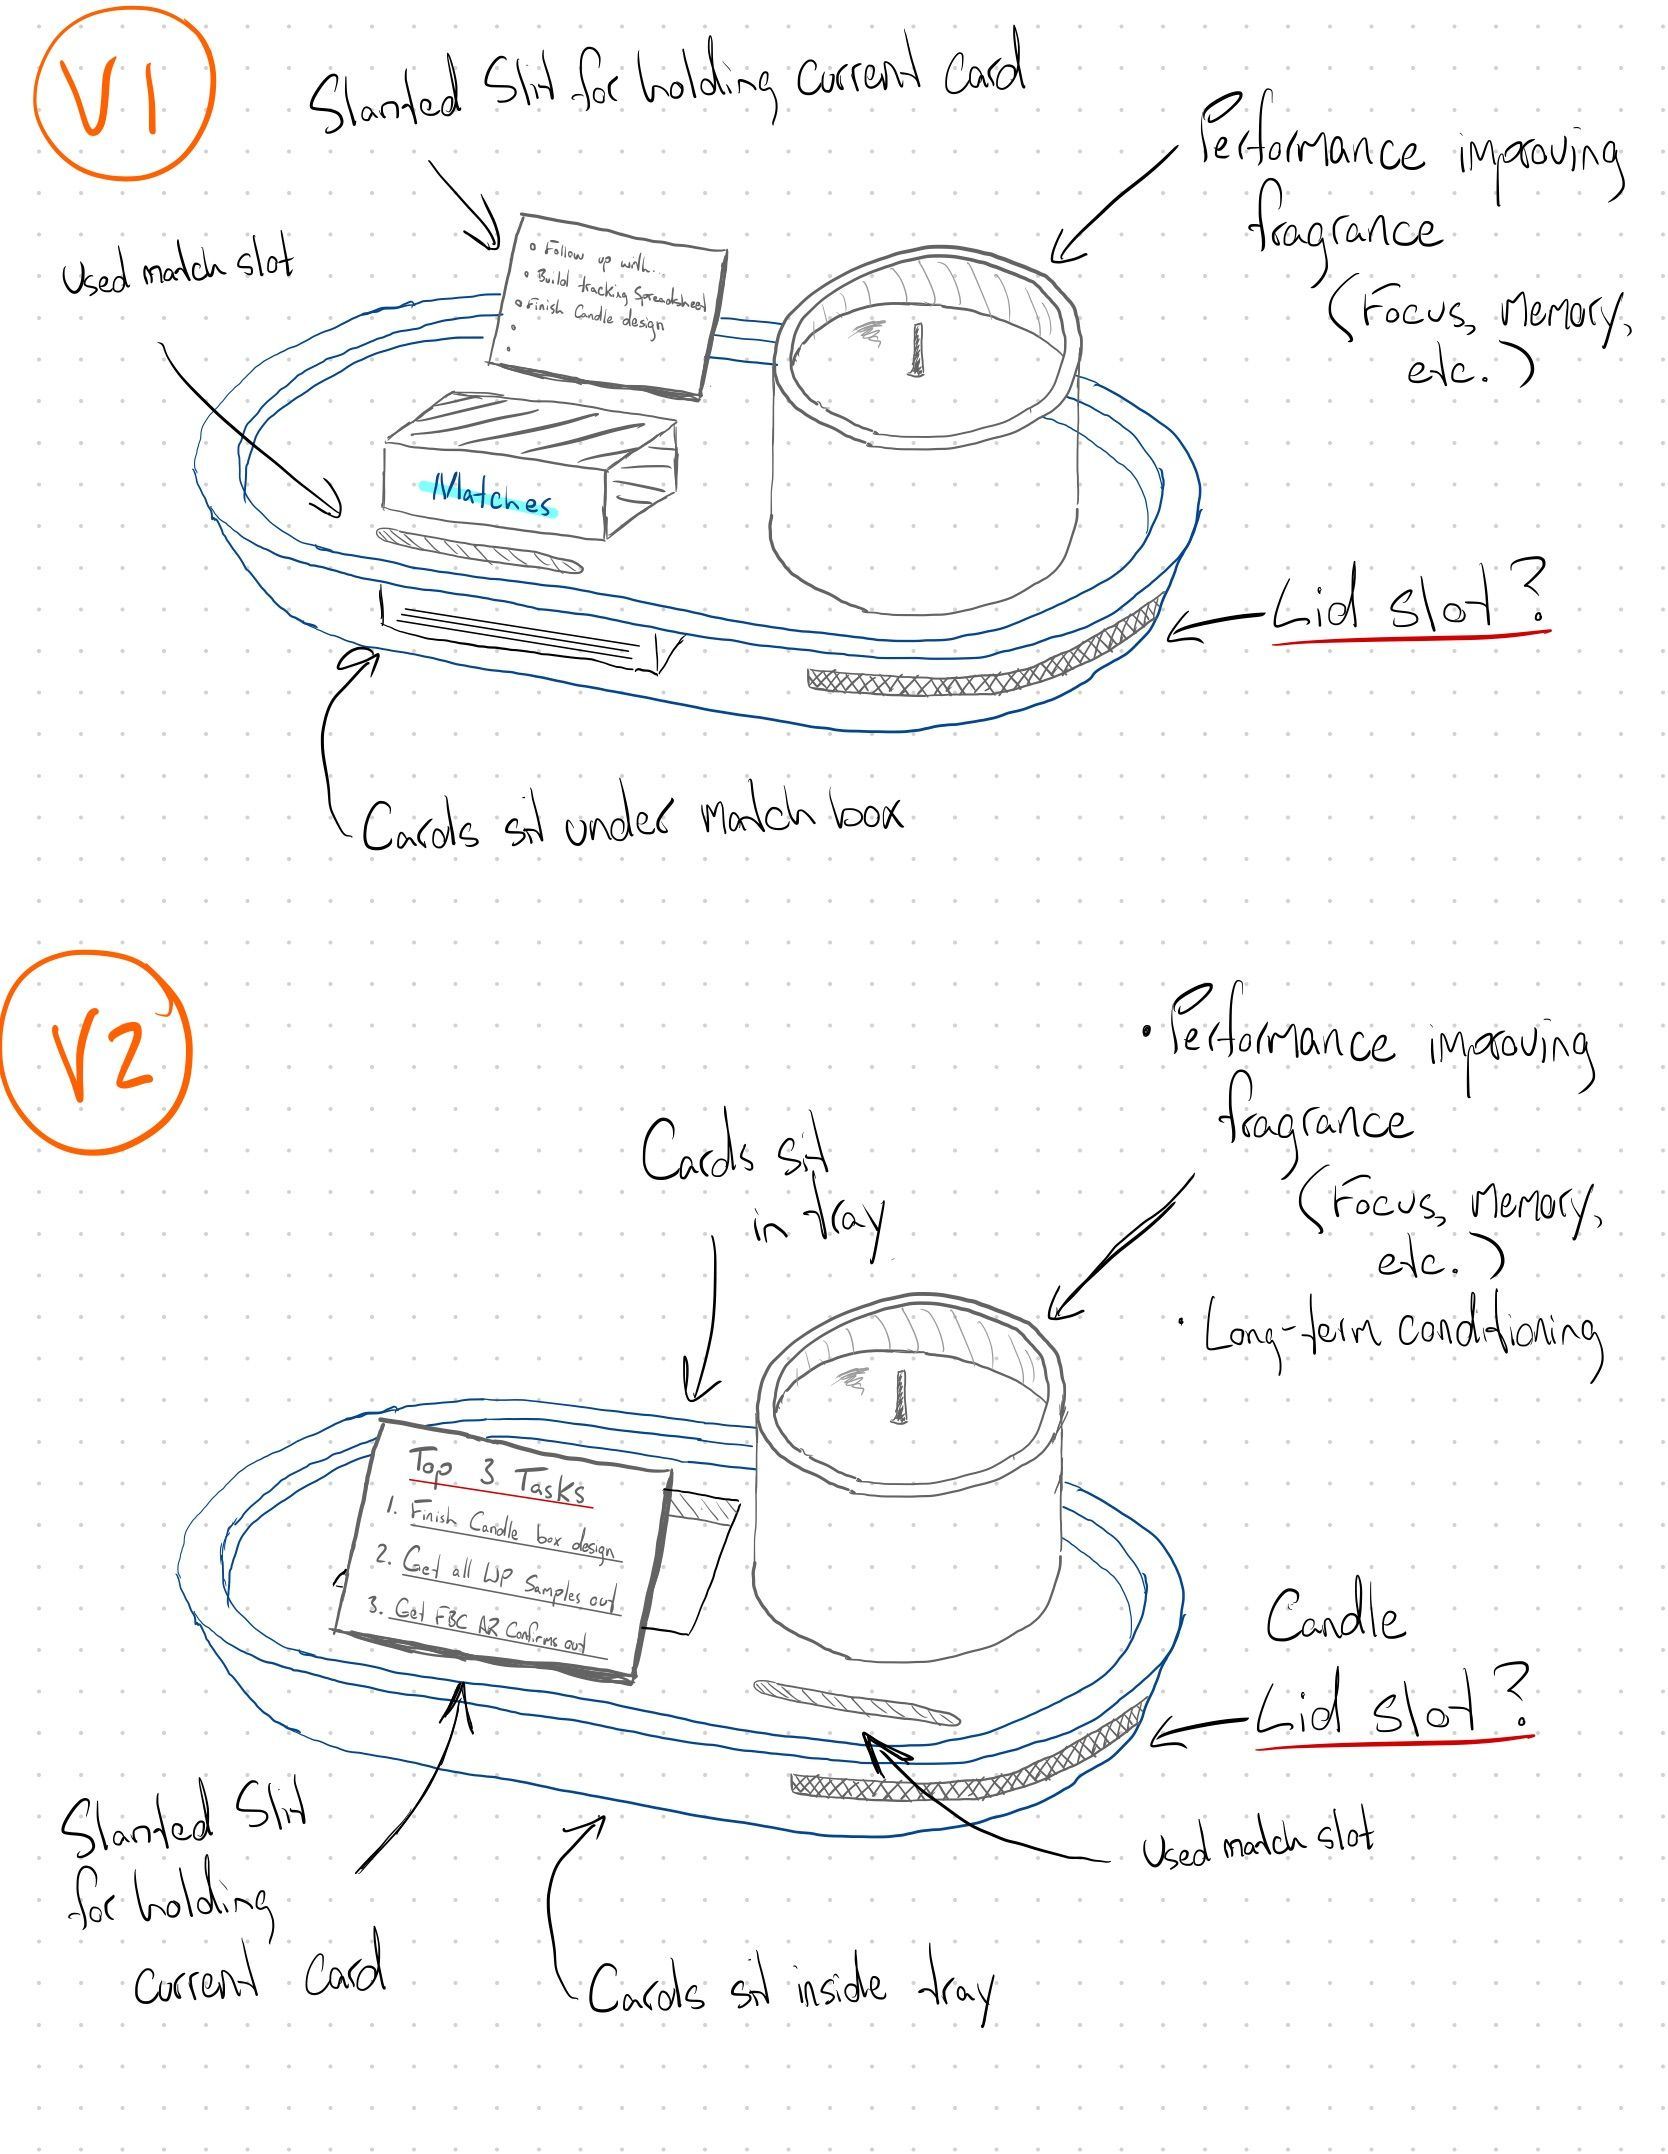
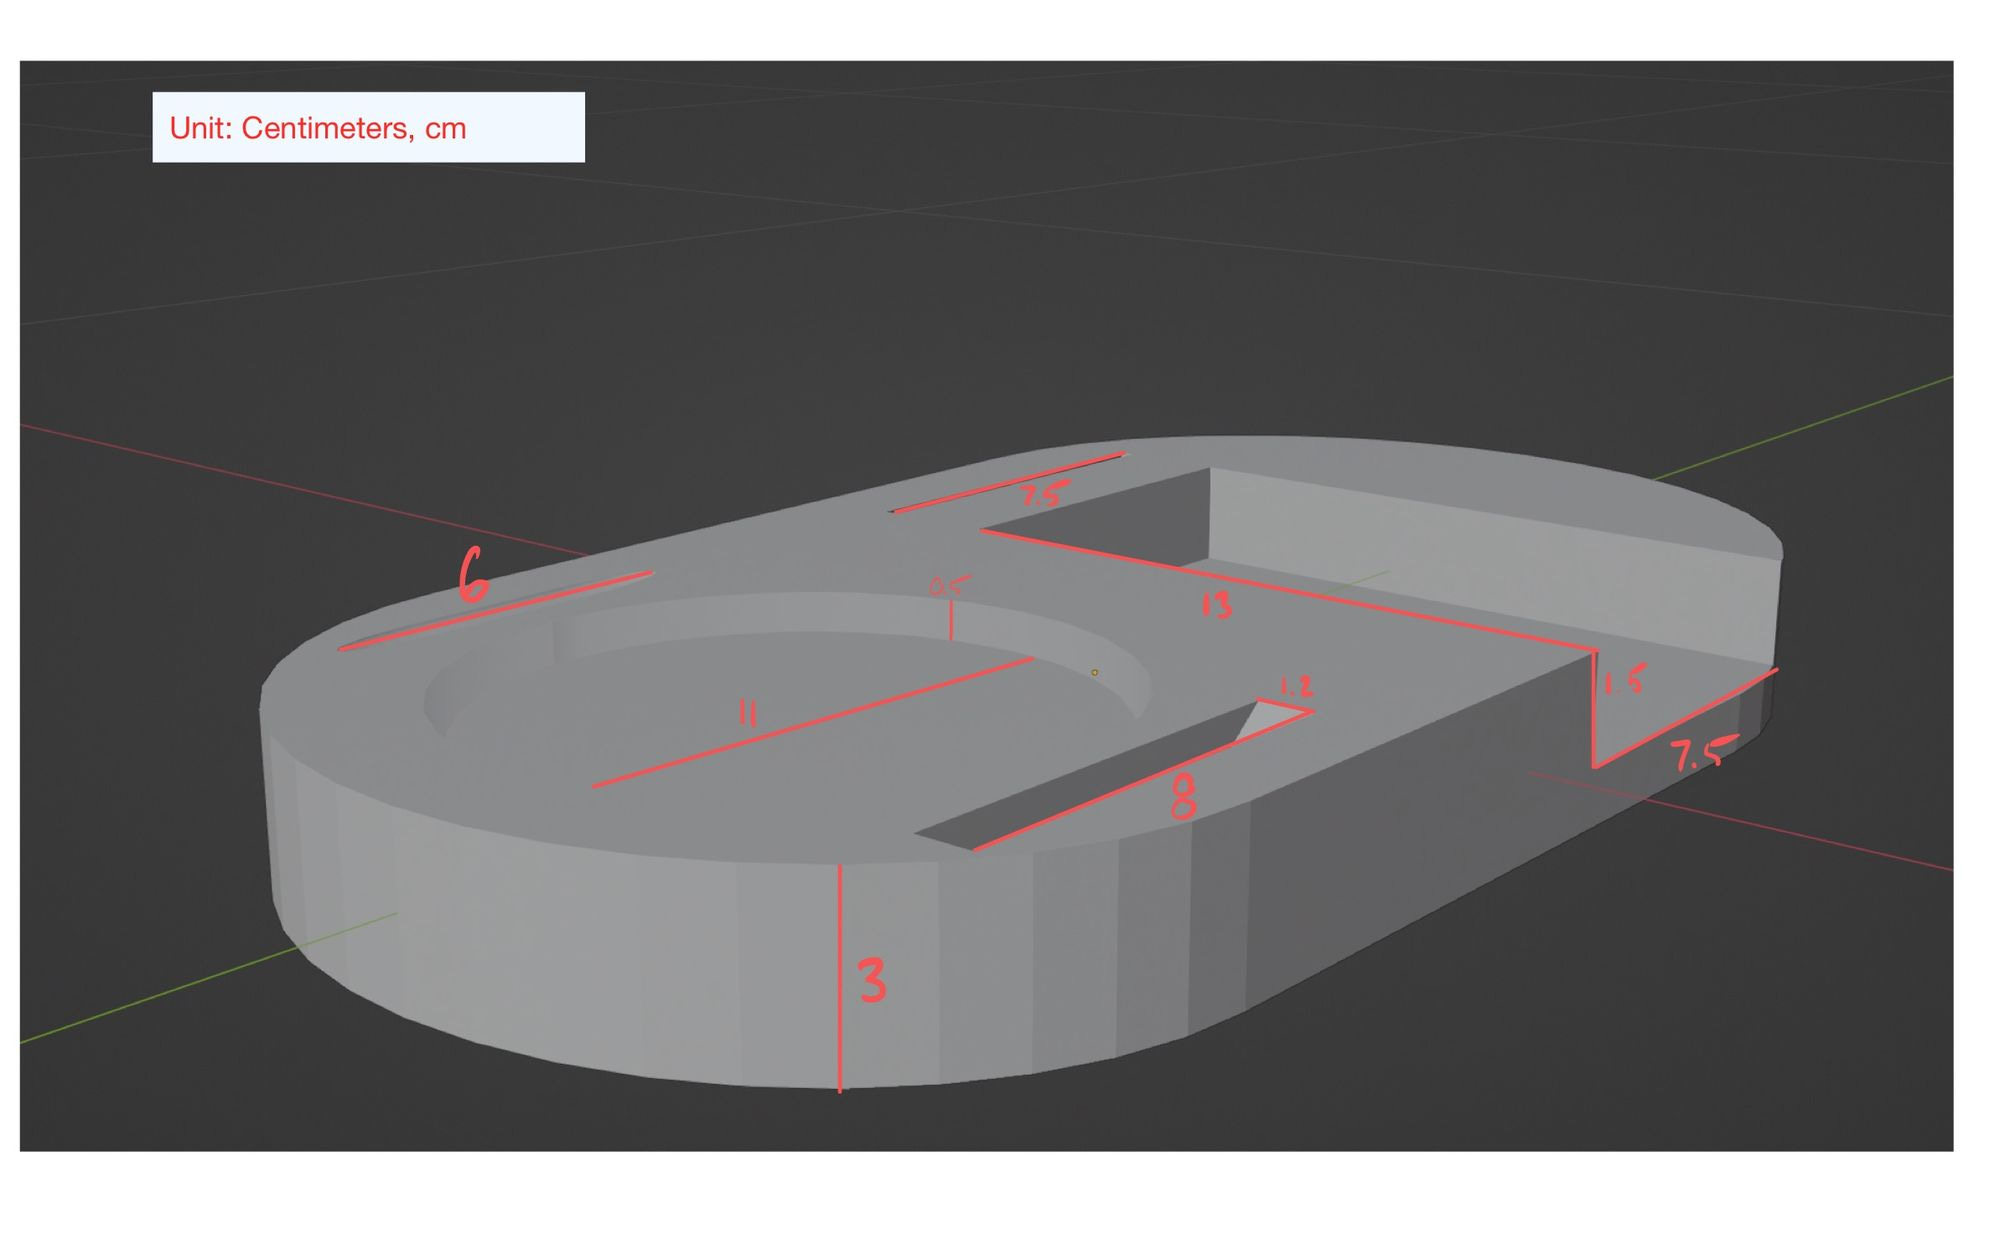
The actual work on "Ritual" in Blender was more difficult. It took me about three full days of intense focus. Here are versions 6 and 7 of the design:
3. Making it Real: MakersLab
The next step was to find someone capable of materializing the digital design. Given our limited knowledge of woodworking, we began by cold messaging local carpenters, attempting to learn about the necessary technology along the way. Unfortunately, the initial responses, if any, were less than encouraging. That was, until we discovered MakersLab.
MakersLab is a community workshop that allows people to create their own products or hire professionals to do it. Located just a ten-minute drive away, we decided to visit.
Arriving early on a Saturday morning, we were fortunate enough to meet Derek, the owner, which proved to be a game-changer. He took the time to understand our vision for "Ritual" and guided us towards the tool we needed - a CNC machine.
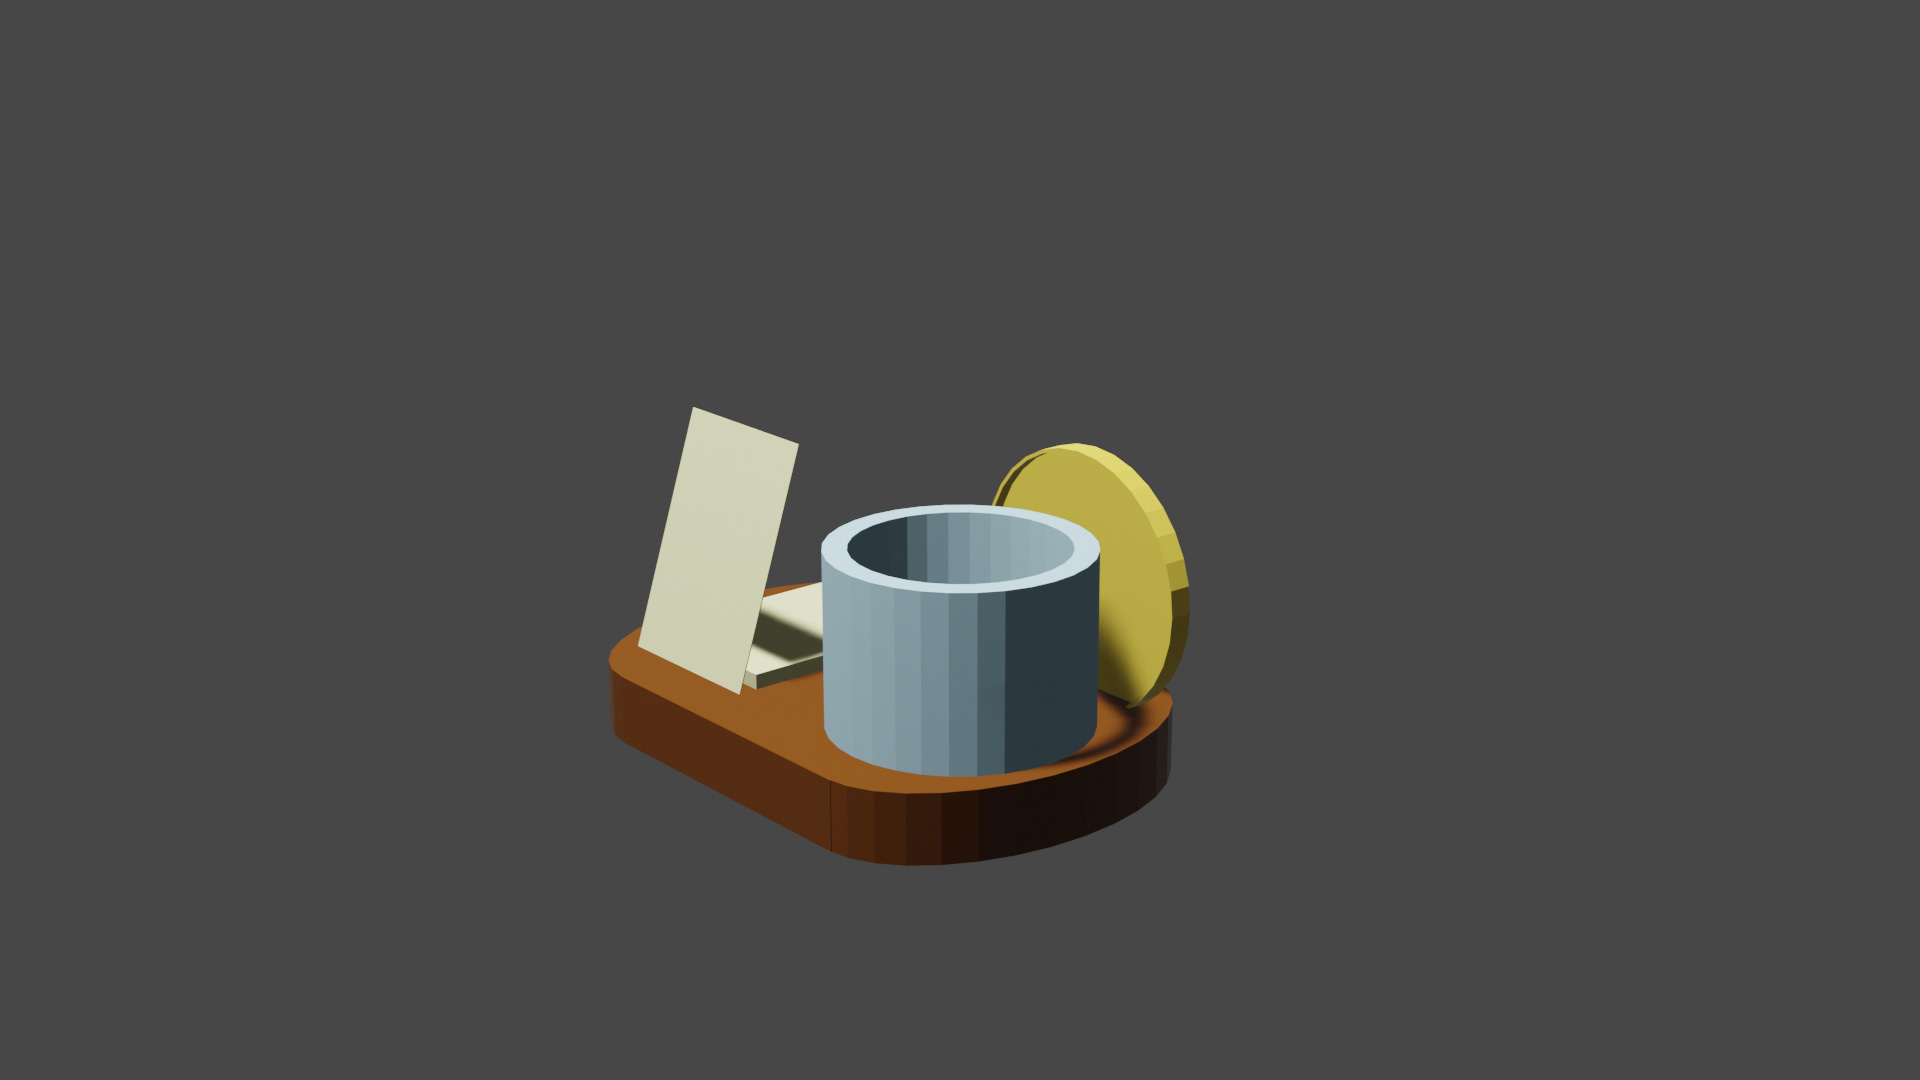
At this point, I learned that Blender isn't the ideal tool for this kind of work. The machine requires a specific type of file, at minimum a vector image. Luckily, Derek simplified the process by requesting screenshots with measurements.
With renewed enthusiasm, we sent over the necessary screenshots and measurements to Derek, entrusting MakersLab with the task of bringing our vision to life.
I want to mention here that our experience with Derek and MakersLab was nothing short of exceptional. For anyone looking to create something unique in the Vancouver area, I highly recommend them.
4. The Supporting Cast: Cards
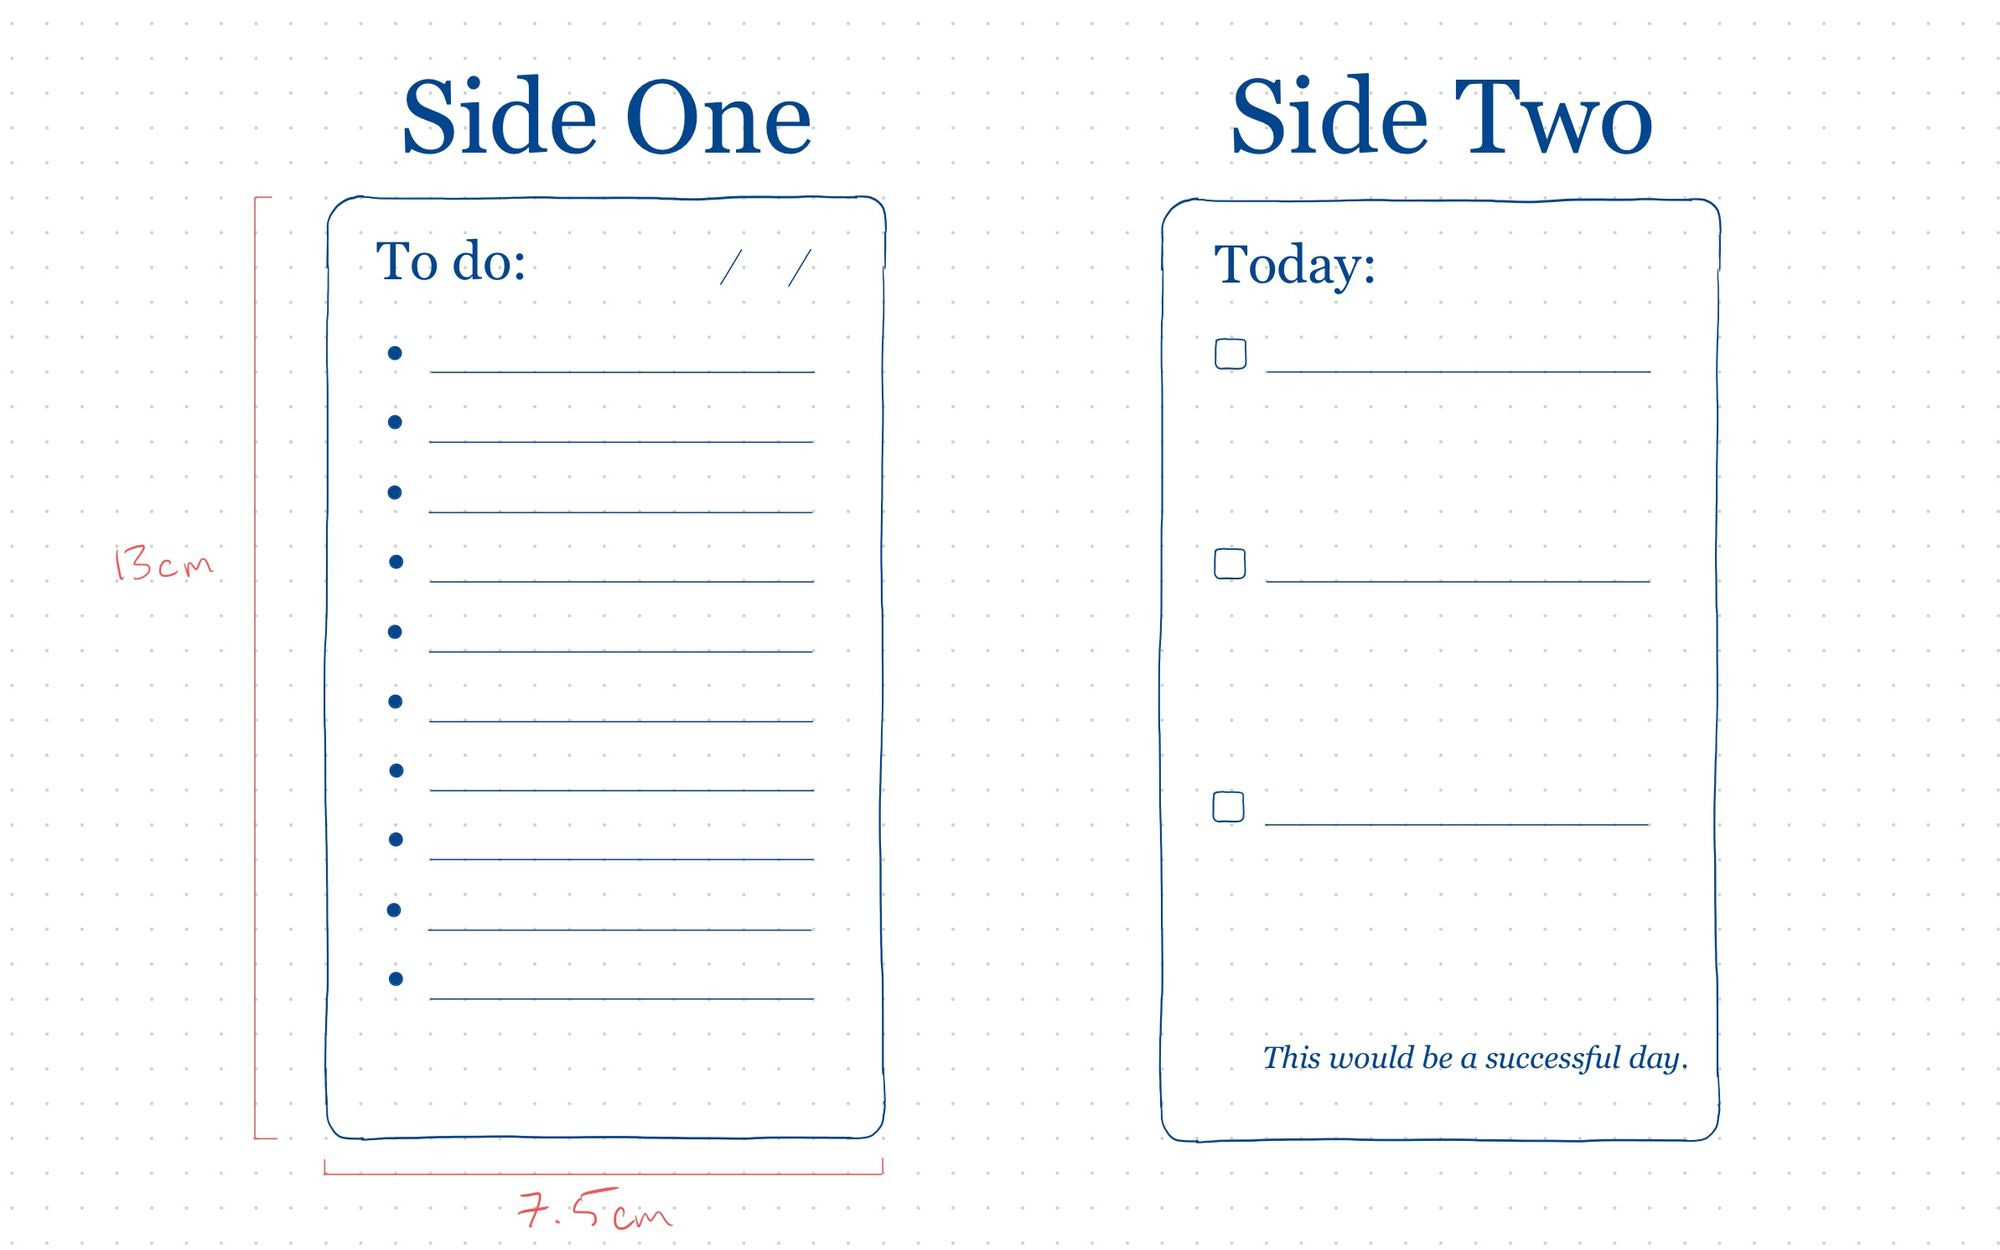
With the board in production, we shifted our focus to the cards—an essential component of the "Ritual" system. Our goal was to create a ritual to help people start their day positively, define their goals, and reflect on their accomplishments at day's end.
We streamlined the process into three simple steps:
Jot down all the tasks for the day.
Flip the card and define exactly what a successful day looks like.
Ceremoniously light a candle and get started.
A potential fourth step involved reflecting on the day's achievements and feeling a sense of accomplishment.
This part was a lot faster than the board. We figured we would just get a rough copy made and then refine the product-market fit through testing and feedback. Following some initial sketches, Ben used Adobe Illustrator to create a digital mockup of the cards. Our next task was to find a printing shop that could bring our designs to life.
Fortunately, Jukebox Printing, conveniently located a short walk away, was the perfect choice. Their professional approach and supportive staff made the card printing process smooth and hassle-free.
5. The Grand Unveiling
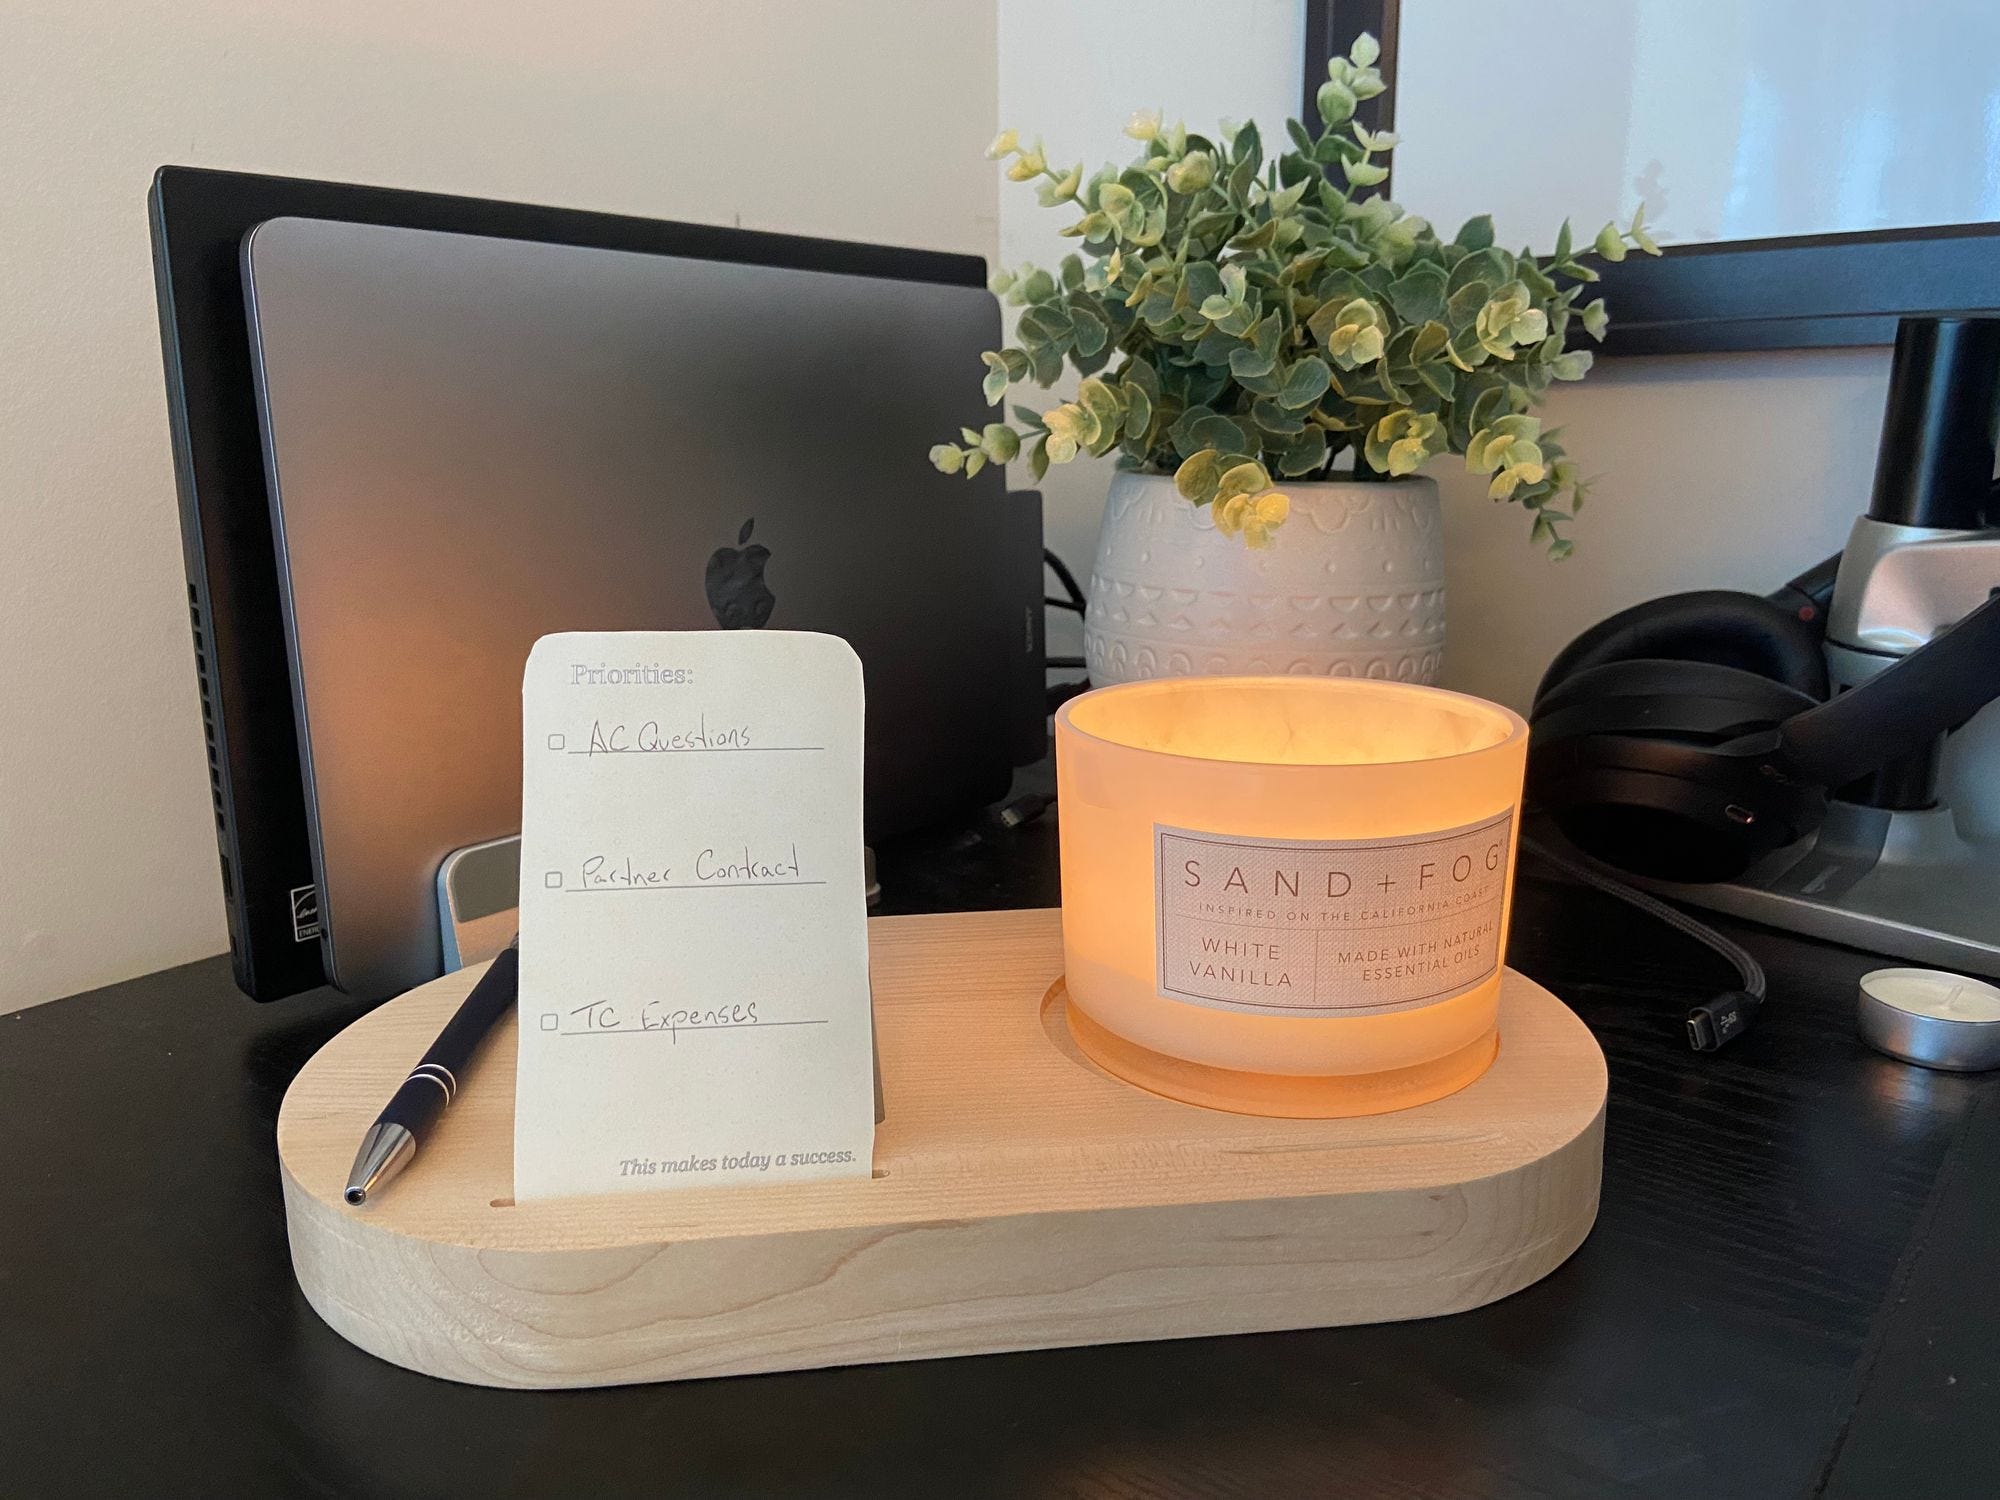
A few weeks later, we received messages from both MakersLab and Jukebox: our products were ready. The sight of the first prototype of the board and the cards, the culmination of two months of hard work, was genuinely one of the most rewarding feelings I’ve had in a long time. Take a look at our first prototypes below.
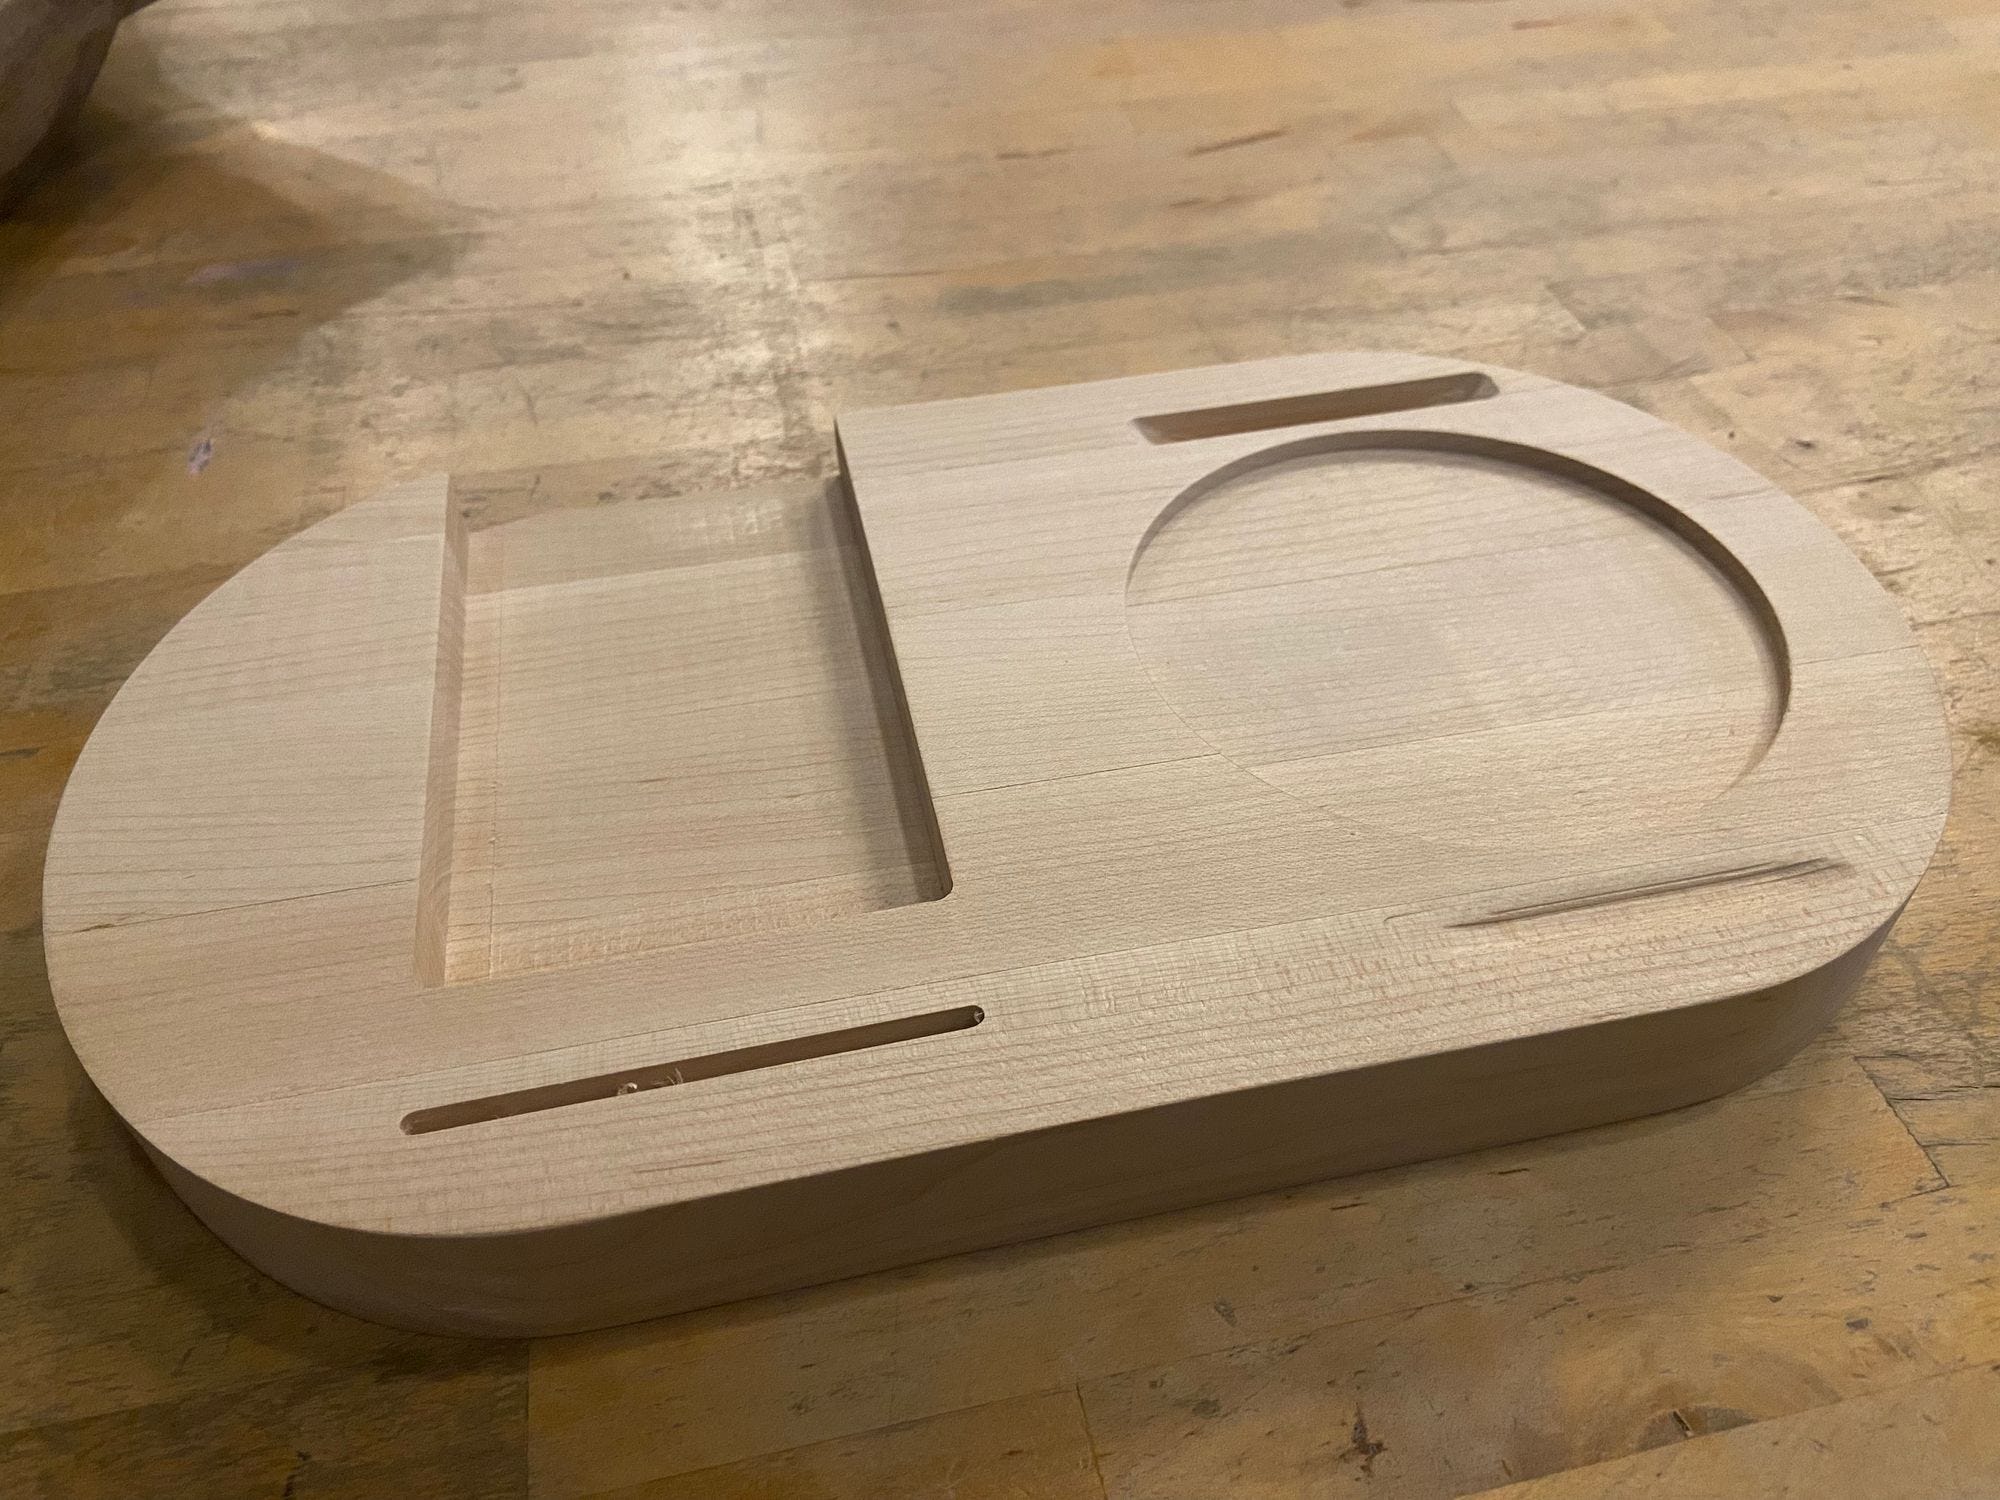
Please note: The images of the final product feature cards printed on our office printer, not the professionally printed versions. Keep scrolling to the right to see the professional cards. We’ve also used another brand’s candles as a place holder until we were able to get our own.
6. In Conclusion
Developing a product is a challenging journey, but seeing our idea, "Ritual", become a tangible reality was worth every step. From sketching and 3D modelling to manufacturing and printing, each phase was an enormous learning experience. Stay tuned for the next entry when I share the candle making process!